
Hi Friends!
I’ve had an interesting few weeks eating through gummy bread and flat cookies. I’ve been learning what not to do in baking. If you know me, you know that I’m a bit of a perfectionist and don’t like learning things the hard way. I’d rather get everything right the first time, every time and not have to waste any time or ingredients. Unfortunately, that isn’t reality, and my most valuable baking lessons have come from my worst mistakes!
Let me back up to the beginning of my baking journey. When I started baking, I thought I knew everything I needed to start baking from scratch. And I proved myself wrong, almost instantly. I remember my very first bake – I was trying out focaccia for the very first time. I remember following a recipe in a cookbook and thinking I could just sub gluten-free flour where the recipe called for all-purpose flour, and everything would turn out perfect. It didn’t, and for a few reasons. For starters, I tossed in active dry yeast without activating it first, so my bread didn’t rise much. And I didn’t realise I needed a binder, like xanthan gum, to give the bread its structure. Without a binder, my Focaccia turned out crumbly.
I did the tiniest bit of research (I’m talking 5 minutes or less) before making my second batch of Focaccia, and my bread turned out even worse! I read on a gluten-free blog that psyllium husk is a great binder in gluten-free breads, so I added it (dry) to my flour along with the dry yeast that I still didn’t realise I needed to activate. My Focaccia turned into a dimply brick. It was kind of hilarious, but also next to impossible to eat (although we did finish it!)
I quickly realised I needed to learn how to bake gluten-free from scratch before I could even attempt to convert a gluten-containing recipe. It was different from baking from a box mix, and a lot more science was involved. That’s when I bought The Loopy Whisk’s cookbook, The Elements of Baking. The author, Kat, is a scientist who also specialises in gluten-free, dairy-free, egg-free, and vegan baking. What a combination! I knew I needed to buy her cookbook because, unlike typical cookbooks, this one teaches how to make any recipe gluten-free. Kat teaches the science behind gluten-free baking and gives the basic rules of recipe conversions. She also teaches about the baker’s percentage (b%), which helps determine the proportion of different ingredients to the total volume of gluten-free flour. Purchasing this cookbook was the turning point in my gluten-free baking journey, hands-down.
I read the cookbook and was still a bit unsure of what I was doing, so I decided to follow Kat’s recipes for a while until I had the hang of it. The first lesson I learned is that active dry yeast needs to be activated in water/milk and sugar before adding it to the flour. I also learned that if you put the yeast, water/milk, and sugar mixture in the microwave for 10 seconds, it’ll bloom much quicker! This is a great hack if you’re short on time. Kat’s recipes also taught me that you need to add lukewarm water to psyllium husk before adding it to the flour. The mixture will form a gel, and that’s where the gluten-like structure comes from. Once I learned these two concepts, my breads started rising beautifully and having the softest, most pillowy texture.
I continued making only The Loopy Whisk recipes, even long after I had the hang of Kat’s methods, because they are just that good. At this point, I picked up the original focaccia recipe I tried at the beginning of my baking journey, compared it to Kat’s, and made some conversions until I was sure I’d have a beautiful, authentic focaccia. It was a HUGE success! See for yourself:
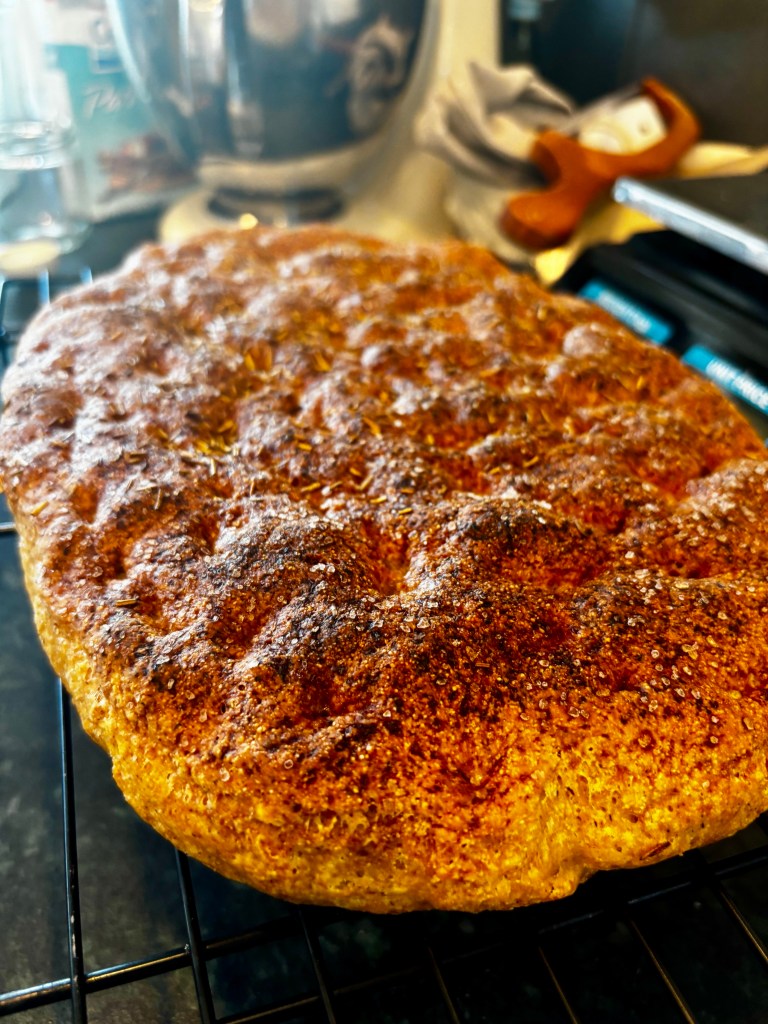
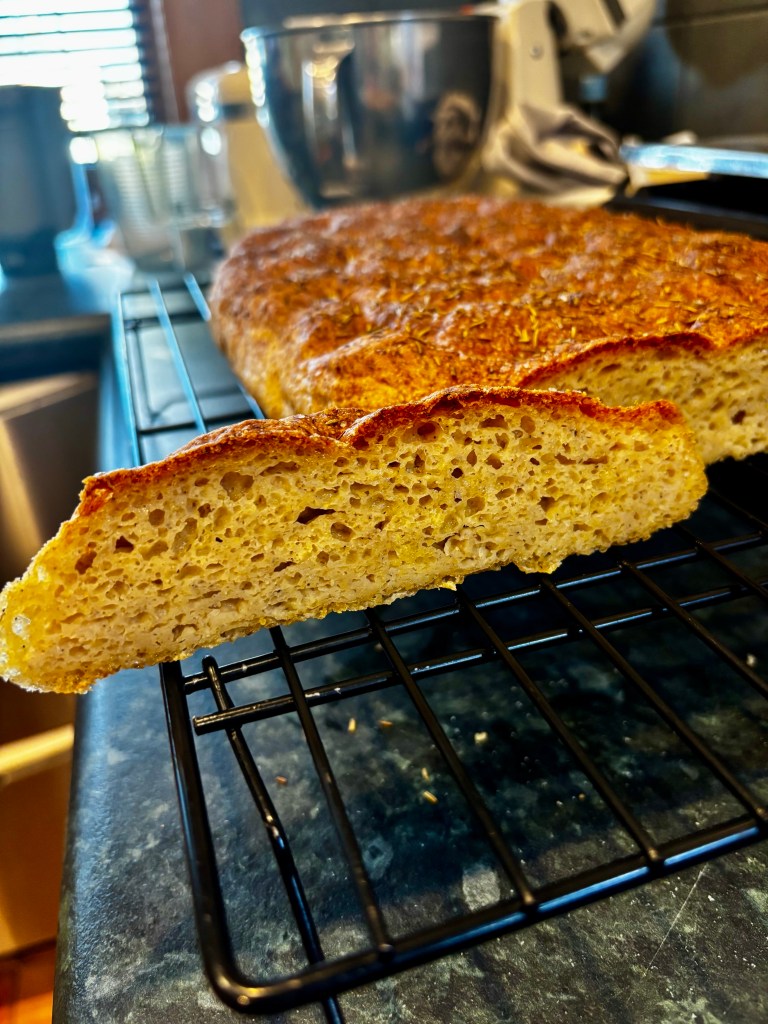
After this win, I gained my confidence and went on to bake many gluten-free creations, which I’ve shared in a previous blog post. Once I started having win after win, I was taken by surprise when I had my first baking fail in months. I was baking focaccia for church lunch. It looked beautiful right out of the oven, but when I cut into it, I realised it was a gummy brick. I noticed it didn’t rise properly before baking, so I hoped it would rise during baking (this had proved true before in my limited experience). I realised after some research that I had gone too olive oil-happy. I poured an excessive amount on the bottom of the pan and drizzled more than usual on top, which caused the moisture content to be too high, thus inhibiting the dough from rising. Lesson learned – more is not always more! I won’t do that again (although I can’t say I won’t be tempted). And that is the last baking lesson I had to learn. Or so I thought…
Not even a few weeks later, I was baking sandwich bread, which I do weekly. This time, however, it turned out gummy and moist. It didn’t rise properly. I remembered then that I had forgotten to spray the pan, and when I Googled, it confirmed that this can cause a bread to rise improperly and therefore be gummy in texture. Cool, should be good for next time, I thought. NOT. I made sure to spray the loaf pan, therefore solving the gumming issue. Except I didn’t solve it, because something else was amiss.
I Googled again, and again, and again. Looking for some kind of answer to the suddenly failed sandwich loaves. What happened? I’ve gotten this bread right every time for months straight. Was it the weather? I told Matt, “I think my baking career is over. I think I’m actually bad at this.” He told me not to worry; we’ll figure this out. I knew the weather was extra humid, and Google told me that high humidity can also affect the moisture content in dough, causing it not to rise. So I reduced the moisture content in the bread by removing some water and putting in less egg. The bread was a little improved, but not by much. Loaf after loaf, for a solid three weeks, was one gummy after the next. And keep in mind, we had to eat this stuff. I don’t like wasting ingredients, and this was the only gluten-free bread we had. I was going all out, toasting the bread on high just to mask some of the gummy texture. It tore up the inside of my mouth!
Until one fateful day, I baked cookies. It’s my usual cookie recipe that’s never failed me. Until that day. And I INSTANTLY knew what was wrong. The cookies were so flat. And they don’t take yeast, just baking powder. That’s it! THE BAKING POWDER. I went straight to Google, which told me that inactive (old) baking powder will make cookies go flat. And then I connected the dots…I was using old baking powder to bake my last three loaves.
I know, you’re probably wondering why all my other loaves before those rose just fine, and it’s because Louis had found a baking powder I hadn’t seen in ages. But it was in a round container that was much easier to retrieve the baking powder from, so I decided I would use that instead of the box that I had been using, which was much harder to access. And that was my infamous mistake! The moment I switched back to my usual (much newer) baking powder and returned the moisture content to normal, my breads went back to rising beautifully.
Just when I thought I had learned all there was to learn about baking, another lesson came hurling my way. Turns out, old baking soda will also affect baking. For me, it caused multiple batches of cookies to flatten completely – but that’s a whole other story. The moral of this story is this: make sure you are using FRESH ingredients when you bake! Also, there’s a lot more to baking than just mixing ingredients and throwing them in the oven. Baking, especially gluten-free baking, is a science. It takes time to acclimate to all the nuances of gluten-free baking. Once you get there, though, it makes for such a rewarding journey.
So if you’re currently on your own baking journey and find that you’re making more mistakes than not, just know that you’re not alone and the best way to learn is by making those very mistakes. Keep at it, because you’ll gain valuable wisdom in the process. It’s not easy, but it’s worth it!
Until Next Time,
Jacqueline xx
 The Cullums Immigrate